
Transcribe by Moliri
Installing and first start
Transcribe is a single file for Windows, transcribe.exe. It needs no installation.
Downloading and starting
-
On the page Transcribe by Moliri , choose Download for Windows.
-
Put the file in a folder of its own, such as
Dokumente\Transcribe. On the first start, a folderdatawith recordings, results and models appears next to it. -
Double-click
transcribe.exe. The app opens in a window of its own and shows the library. If Windows warns you because it does not know the file yet, start it with More info and Run anyway.
The Transcribe icon appears at the bottom right of the taskbar. Clicking it opens the window, and
right-clicking shows Einstellungen (settings) and Beenden (quit). If you start transcribe.exe a second time, you only get the window of the app that is already running.
The first start
On the first start, Transcribe downloads from the internet what it needs for recognition: the recognition runtime, FFmpeg for audio and video, and the models for speech, speakers and sounds. Together that comes to a few hundred megabytes up to a few gigabytes. A bar at the bottom of the window shows what is loading at the moment. You can already use the interface; jobs start as soon as everything is ready.
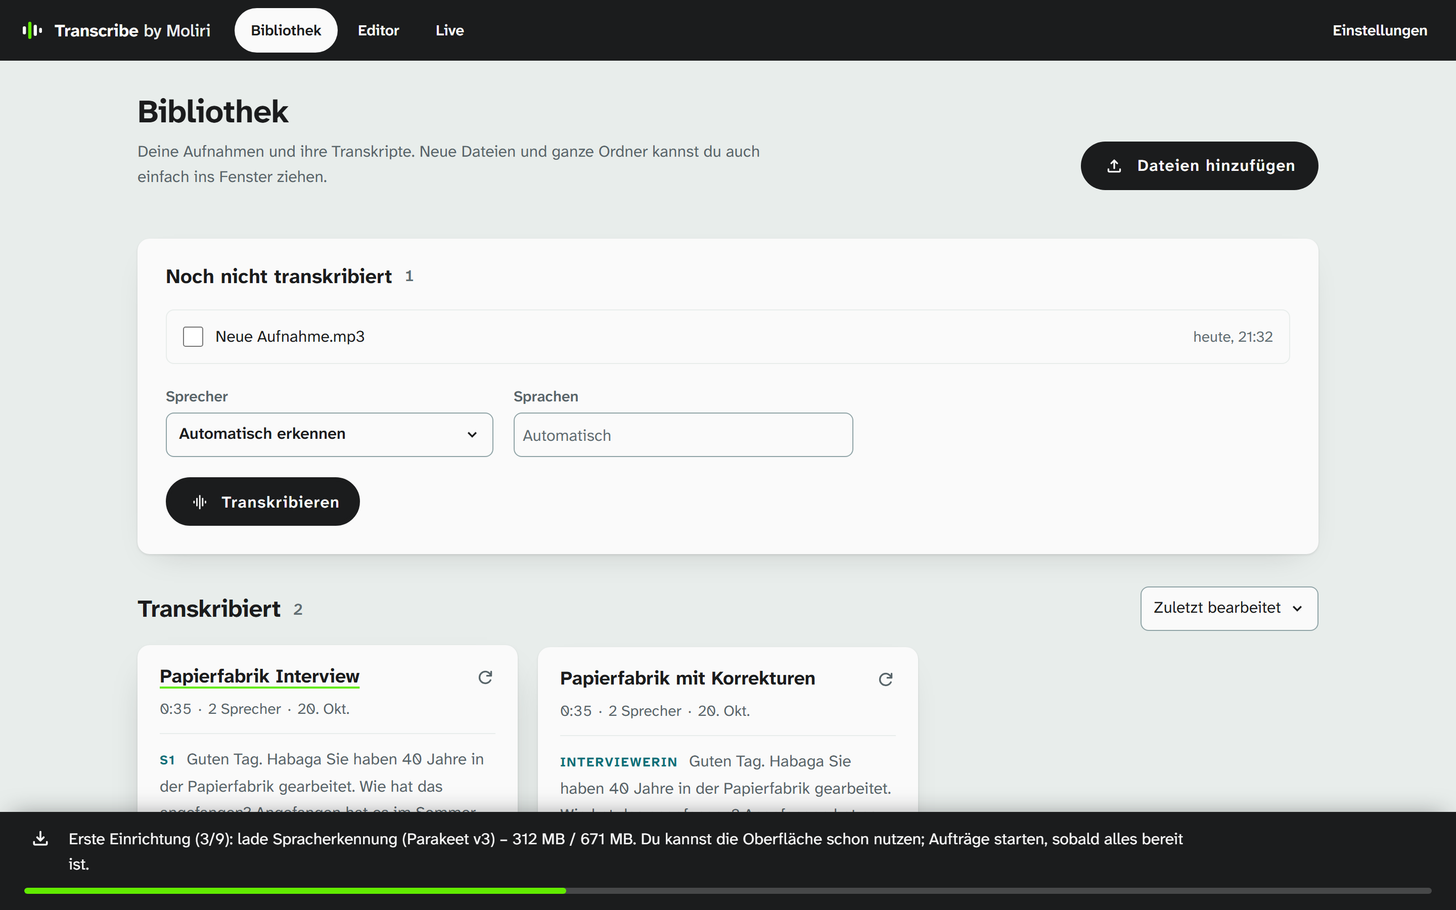
You can already fill the library during the first setup.
After that, Transcribe works without the internet. Anything needed only later, such as text recognition or a model for other languages, the app downloads the first time it is used. Under Einstellungen → Speicher und Modelle (storage and models) you can see what is installed and what comes „bei Bedarf“ (on demand).
If a download fails, the same bar says so. Then restart the app or download it again under Einstellungen.
Graphics card
If the computer has an NVIDIA graphics card, Transcribe asks once whether it should speed up recognition. GPU-Laufzeit laden (load GPU runtime) fetches the libraries needed, about 500 MB, and if you wish also the missing parts directly from NVIDIA; in doing so you accept NVIDIA’s licence terms. Nur Prozessor nutzen (use processor only) leaves everything as it is. You can change this at any time under Einstellungen → Grafikkarte (graphics card).
Where the data is kept
Everything is in the folder data next to the app: recordings in audio, transcripts and corrections
in results, the models in models. To back it up or move it, copying the folder is enough. Einstellungen → Speicher und Modelle shows the folders with their size and opens them.
Starting with Windows
Under Einstellungen → Andere Programme (other programs) there are three switches:
| Switch | Effect |
|---|---|
| Im Hintergrund bereit (ready in the background) | Recognition stays loaded and a recording starts at once. Programs such as Moliri may have Transcribe record from the microphone. Takes up about 1 GB of memory. On at first |
| Mit Windows starten (start with Windows) | Transcribe starts without a window when you sign in and waits as an icon in the taskbar |
| Nach dem Schließen weiterlaufen (keep running after closing) | Closing the window does not quit the app; it stays in the taskbar and keeps accepting jobs |
If you use Transcribe with Moliri, switch on Mit Windows starten. The app is then there as soon as Moliri needs it.
Recognition through a service
Instead of the models on the computer, Transcribe can use a service through its API. Under Einstellungen → Erkennung (recognition) there are three options:
| Option | Meaning |
|---|---|
| Nur auf diesem Rechner (only on this computer) | The models run here, and no recording leaves the computer |
| Nur über eine API (only through an API) | The recordings go to a service, on the internet or in your own network. The app downloads no models for this |
| Beides (both) | One default each for live and for whole recordings; in the library you can choose for each recording |
The choice includes ElevenLabs and services with an OpenAI-compatible interface, such as a server of your own in the institution. You enter the address, model and key there.