
Files
Edit an image
Image editing, called the image studio in this handbook, opens from an image through the View file button (eye icon). A single click on the image, by contrast, only opens the enlarged view. The image studio does not change the original file: crop, rotation and markings are stored separately from the original. For conservation this means you can mark damage on the condition photo of a loan without altering the photo itself.
Cropping
-
Choose the Crop tool (
C). -
Drag a rectangle over the area you want.
-
Enterapplies the crop,Esccancels it.
Exports apply the crop by default. To get the uncropped image in a report:
{# IMAGE img($file, { width: 6, render: { crop: false } }) #}
Rotating
Rotate the image and keep the result with Save rotation. The rotation, too, is stored as information beside the original.
Marking up
Freehand (P), Line (L), Rectangle (R), Ellipse (E), Polygon (G), Arrow (A), Text (T). With
Select (V) you can pick up markings; with the hand (H, or hold the space bar) you move the visible
section. Ctrl + Z undoes, Ctrl + Shift + Z or Ctrl + Y redoes.
Markings are also applied in exports by default, and in a Word template you can switch them off with render: { overlay: false }.
Setting the scale
Measure tool (M): drag a line over a distance of known length and enter that length. From then on,
further measurements in the image are to scale.
This is useful when recording damage on photos without a scale bar, provided a known edge is visible.
Setting hotspots
A hotspot is a named marker at one spot in the image.
-
Choose the Hotspot tool (
O). -
Click the spot in the image.
-
Choose the Type from the list, which applies to the whole installation.
-
Add a Text and, if needed, link a detail image under Linked image: Choose image… from the files, or Upload. The upload window also lets you take a photo with the camera directly.
Clicking a hotspot opens it for editing, dragging moves it. You can open the detail image from the hotspot.
Administrators manage the types under Settings › Data › Hotspot types. Because they apply to all projects, the same type means the same thing everywhere, in the collection and in every exhibition.
Comparing two images
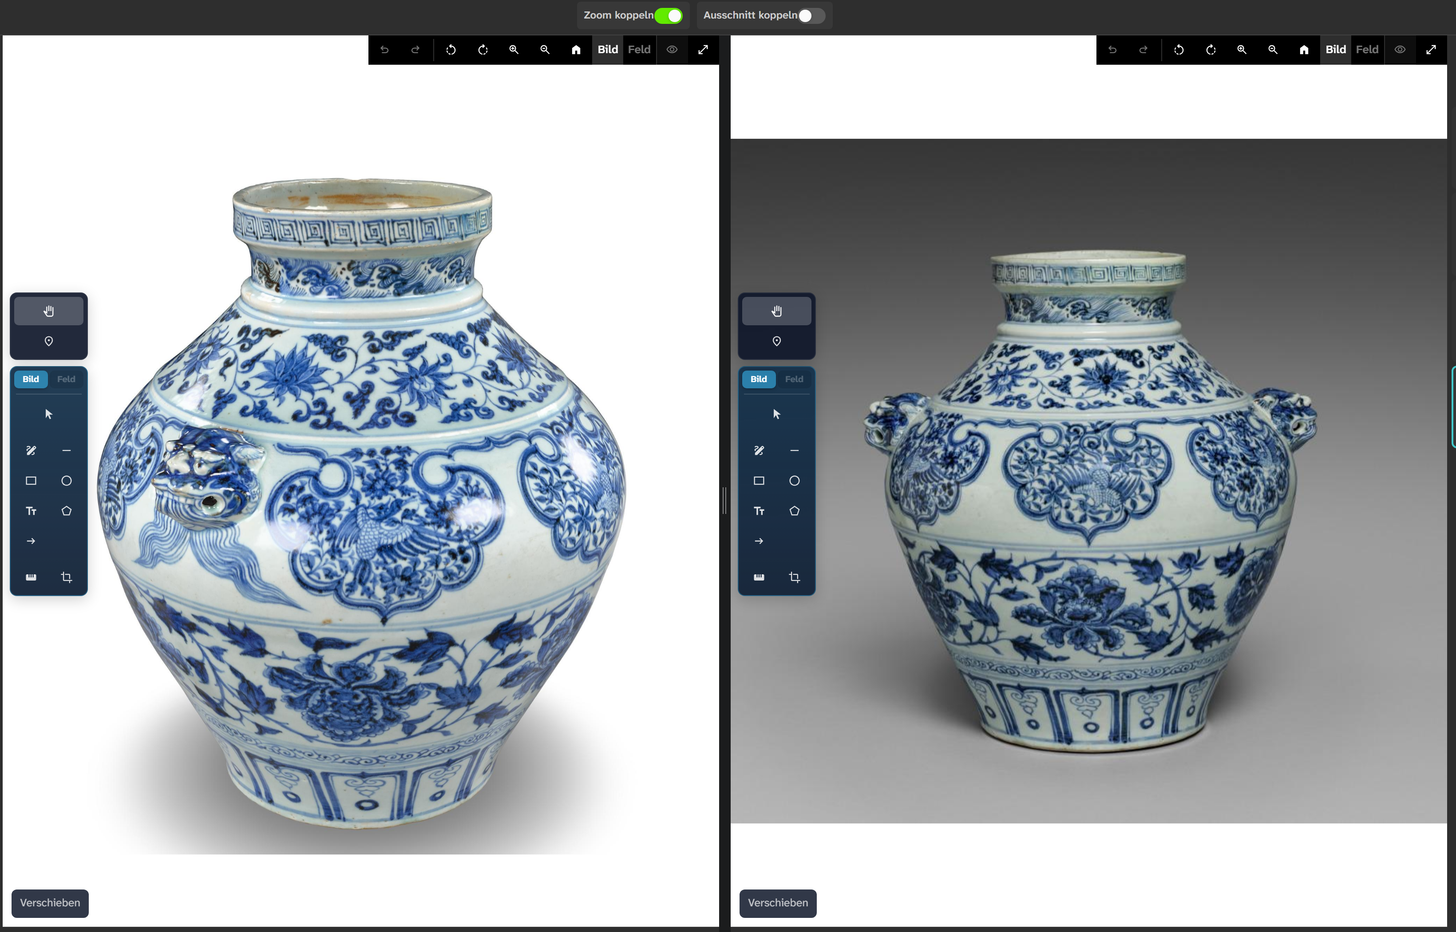
In the object view, choose Compare Images from the Tools menu and select two images of the object, for example the condition photo on arrival and after return. Sync Zoom and Sync Nav link the magnification and the visible section of both images.
When the image is replaced
If the field carries a crop or an overlay, Moliri asks Keep crop & overlay? when the image is changed and shows both images:
| Answer | Effect |
|---|---|
| Keep current crop & overlay | The settings are applied to the new image |
| Use the new image’s own | The settings of the new file apply. Only shown if the new file has any |
| Start clean (no crop/overlay) | The new image without crop or overlay |
| Cancel | The image stays as it was |
Further reading
- Image studio : all tools and options
- Image : the field type
- Template functions :
img()and its options