
Files
Export files
Put together the images of an exhibition for the catalogue, the press office or the lender, or print the objects to scale so you can lay out the hang on the floor.
As a ZIP archive
-
Narrow down the object selection. The export covers its files.
-
In the sidebar, open Data In- & Export, then Export and Images & Files.
-
Choose the Source: a particular File field, for example Title image, or All files.
-
With All files, narrow it down with Add filter … if needed. You can filter by fields, keywords, file types, file extensions, copyright, rights holders and creators.
-
In the Output group, choose the Max. export size: original files or an edge length from 4096 down to 128 pixels.
-
On the File names tab, Path group, build the Folder level and File name from fields if needed, for example one folder per object named after its inventory number.
-
In the Image source group, decide whether crop, markings and rotation are included: as on the field, as on the file, or not at all.
-
Download Files as Zip.
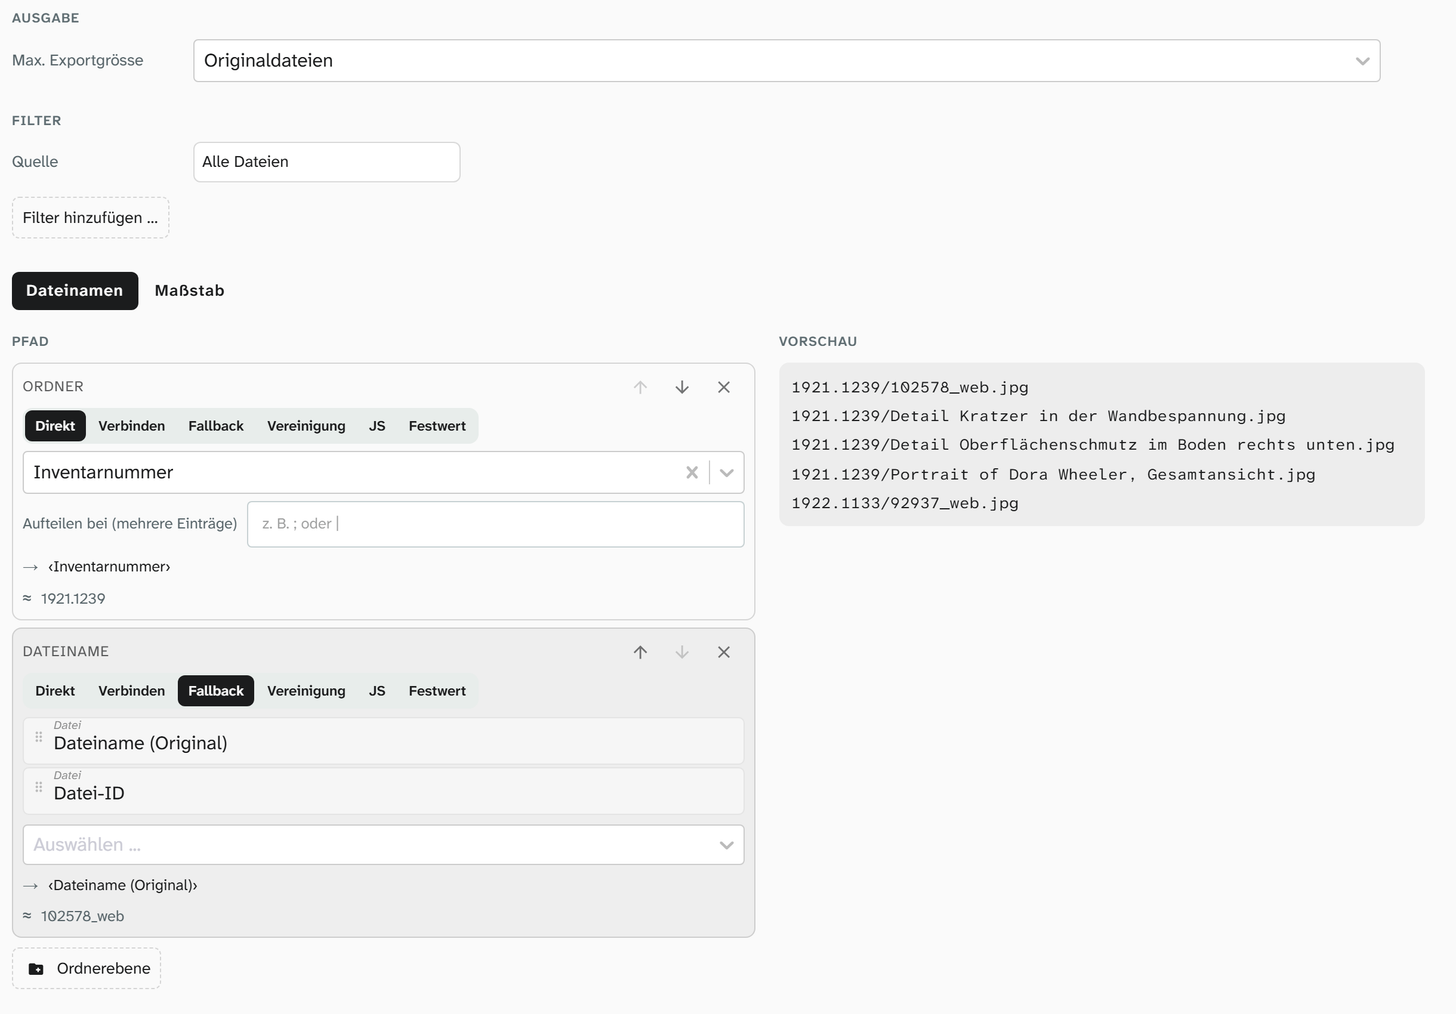
Several filter rows apply together (AND). Within a row you set how the values combine: Contains any of (or), Contains all of (and) or Contains none of (and). Example: a File types row with Contains any of (or) image and PDF, plus a Keywords row with Zustand Eingang (condition on arrival), gives all images and PDFs with that keyword.
A setup you use again and again can be saved under Presets.
Whether a keyword is spelt differently from what you expected is best noticed on ten objects, before an archive of 3000 files is built.
Scaled PDF
A PDF in which every object is shown to scale. For installing an exhibition, for mounts and trial hangs. It is the Scale tab of the same export.
-
Choose the fields holding the object dimensions for width and height, for example Width and Height.
-
Optionally set the Label printed next to the object. You assign it like a field, with fallback fields or a fixed value, for example Inventory number, or Object title as a fallback.
-
In the Sheet group, choose the Paper size, the orientation and the Scale (automatic or 1:x), plus how the image fits: Fit inside (contain), Fill (cover) or Stretch (fit).
-
Set the options:
Option Effect Rotate objects when packing Allows a 90° rotation so that more fits on one sheet Split oversized objects across sheets Divides objects that are too large across several sheets Print reference scale Prints a reference of 10 cm and 1 cm -
Create scaled PDF. The message states the number of objects and sheets and the scale.
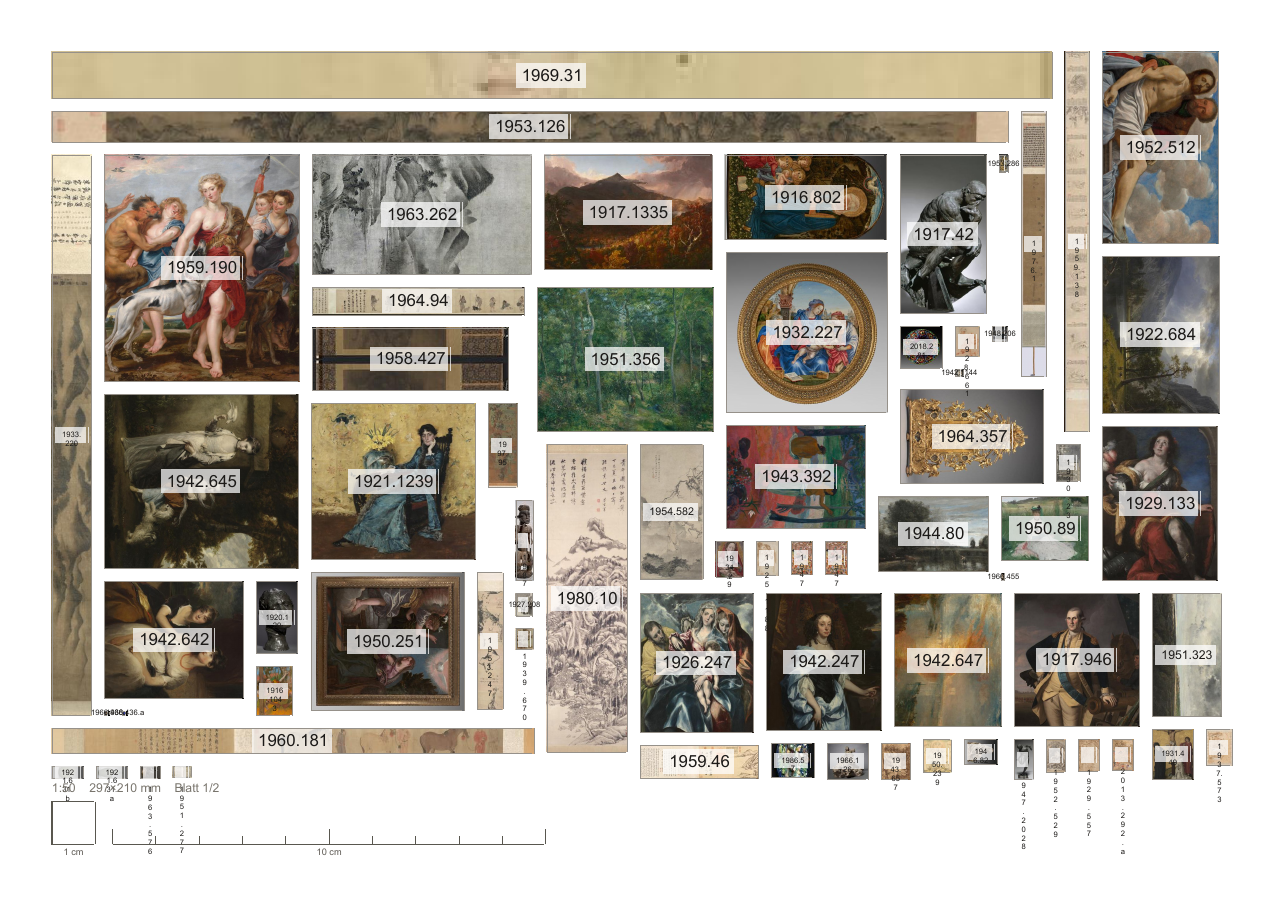
Printers like to rescale on their own. With the printed reference you can check on the sheet that the scale is right. Measure with a ruler before you cut anything.
Objects without dimensions are skipped, and so, when splitting is switched off, are objects that do not fit on any sheet. Both are reported.
The wall planner prints plans of whole walls, see Wall planner .
Further reading
- File export : all filters and options
- File library : the details you can filter by