
Import and export
File export
The files of the current object selection as a ZIP archive or as a scaled PDF. You open the export in the sidebar under Data In- & Export, section Export, Images & Files.
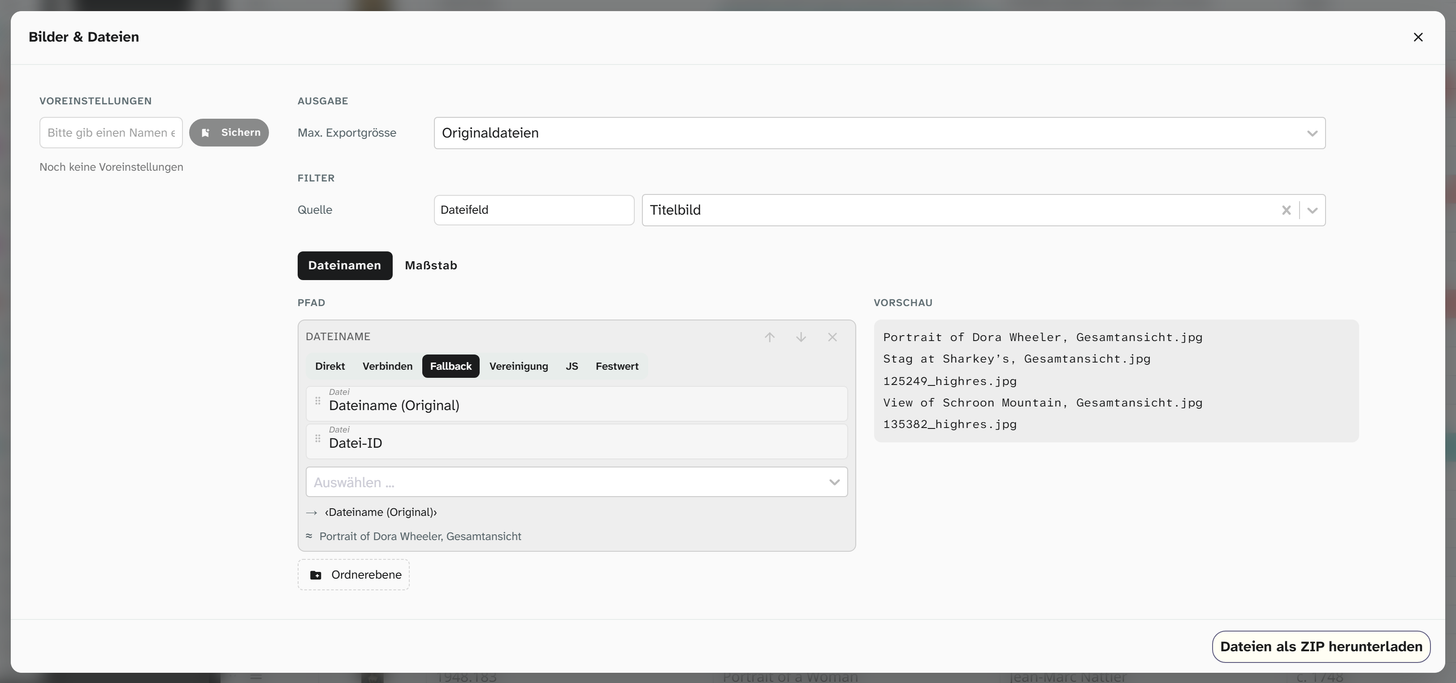
Output
| Setting | Values |
|---|---|
| Max. export size | An edge length in pixels or Original files. Original files are copied unchanged |
Filters
| Setting | Meaning |
|---|---|
| Source | File field: only the files in a particular image or file field. All files: all files of the objects |
| Add filter … | A further condition. Each consists of a property, an operator and values |
Properties you can filter by: Fields, Keywords, File types, File extensions, Copyrights, Copyright owners, Creators.
Only files you are allowed to see are exported. A file that lies only in an image or file field hidden from you is missing from the export, and its keywords, creators and rights details do not appear among the filter suggestions.
| Operator | Meaning |
|---|---|
| Contains any of (or) | At least one of the values applies |
| Contains all of (and) | All values apply |
| Contains none of (and) | None of the values applies |
| Contains (text) | Contains the character string |
| Does not contain (text) | Does not contain the character string |
| Starts with (text) | Starts with the character string |
Which operators are offered depends on the property. If nothing is left after the filters, the export reports No files available for export based on the current filters.
Image source
Applies to both tabs. Hidden with Original files, because then nothing is edited.
| Setting | Values |
|---|---|
| Crop, Markings, Rotation | Each Field (stored on the object’s image field), Image (stored on the file) or None |
“File names” tab
The file name and folder in the ZIP are built from fields and file details, for example Objektart/Inventarnummer.jpg.
| Building block | Meaning |
|---|---|
| Folder | One folder level. Folder level adds another one |
| File name | The name of the file |
| Move up, Move down, Remove level | Change the order and structure |
As values you can choose the project’s fields and the file details: File name (original), File name (storage), File type, File extension, Description, Keywords, Creator, Rights holder, Licence, Width (px), Height (px), Resolution, File size (bytes), Uploaded on, Published on, File ID, plus Export date, Running number and Project ID.
How a level forms its value is chosen with the tabs above its building blocks: As is (one value), Concat (several values with a separator), Fallback (the first value that is not empty), JS (a small function of your own) or Fixed (a constant text). The default for the file name is Fallback from File name (original) and File ID. Below the building blocks you see the pattern (such as ‹File name (original)›) and a sample result.
The Preview shows the resulting names for the first files. Download Files as Zip starts the export.
“Scale” tab
From object images and measurement fields Moliri produces a PDF in which every object is shown at the same scale, for example as a layout guide for mounts or a trial hang.
| Section | Settings |
|---|---|
| Dimensions | Width field and Height field, each a number field with the object’s measurements |
| Label | Optionally a field whose value is printed next to the object |
| Sheet | Paper size, Orientation (Automatic, Portrait, Landscape), Scale (fixed or Automatic (fit)) |
| Arrangement | Image fit (Fit inside, Fill as the default, Stretch), Rotate objects when packing, Split oversized objects across sheets |
| Check | Print reference scale (10 cm / 1 cm) |
Create scaled PDF distributes the objects across the sheets as compactly as it can and reports the result:
| Message | Meaning |
|---|---|
| Printed n objects on n sheets (1:n) | Result with scale |
| n objects skipped, no measurements | Width or height field empty |
| n objects do not fit a sheet at this scale | Too large, and Split oversized objects across sheets is off |
| No objects with measurements and an image | Both are required |
Objects that are split carry a note such as Part 1/2 × 1/1 on each sheet.
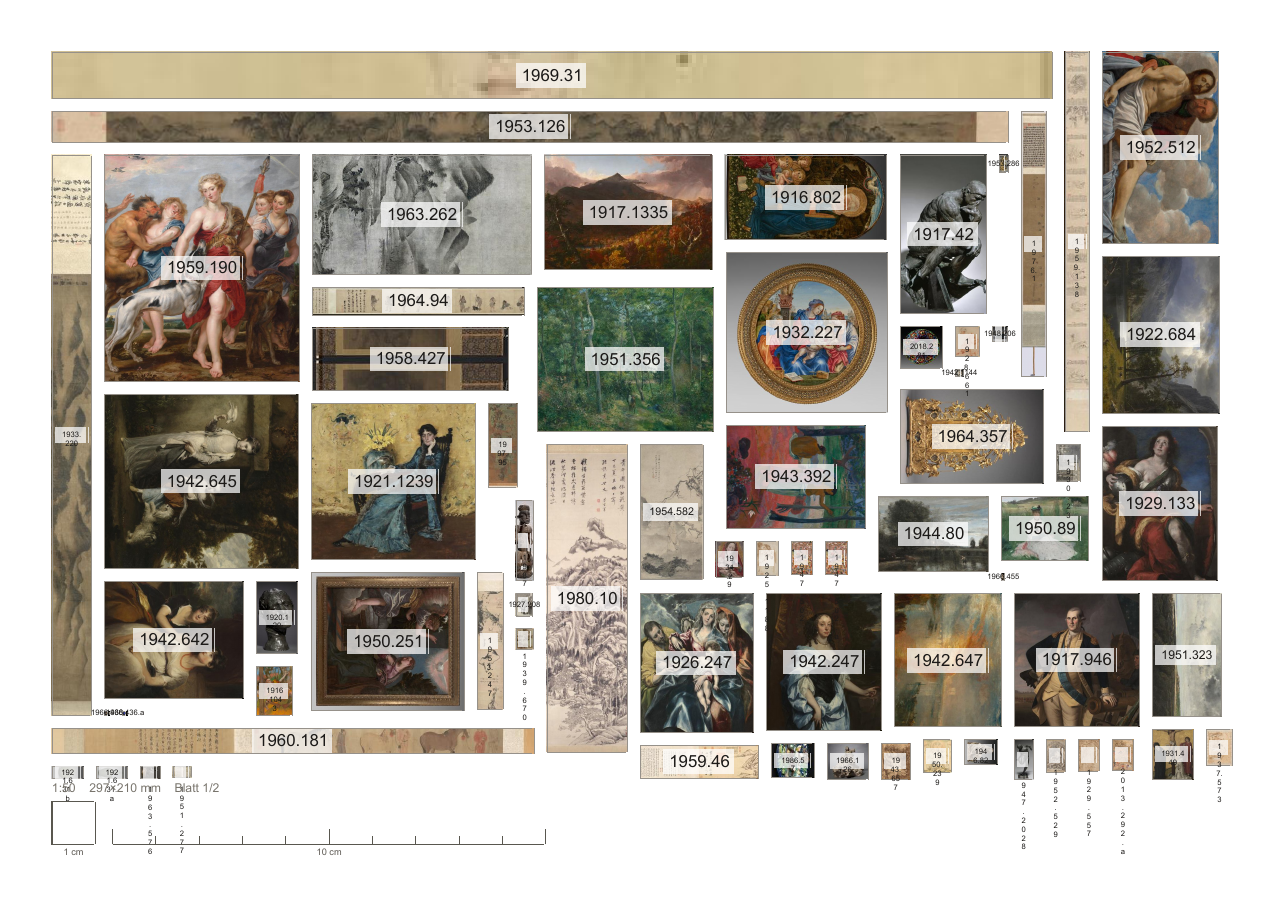
Printers like to rescale on their own. Measure the printed reference scale with a ruler before you cut anything to the sheet.
Presets
Under Presets you can save the settings, load them, overwrite them with the current settings and delete them. A preset can be Shared with everyone.
Further reading
- Export files : the procedure
- Supported formats
- File library : the details you filter by