
Wall planner
Floor plan with display cases and partition walls
A wall is an elevation, a floor plan is a top view. On the floor plan you measure with width and depth, not with width and height. This is where display cases, partition walls and everything that does not hang on a wall stand: a sculpture on its plinth, a table, a bench.
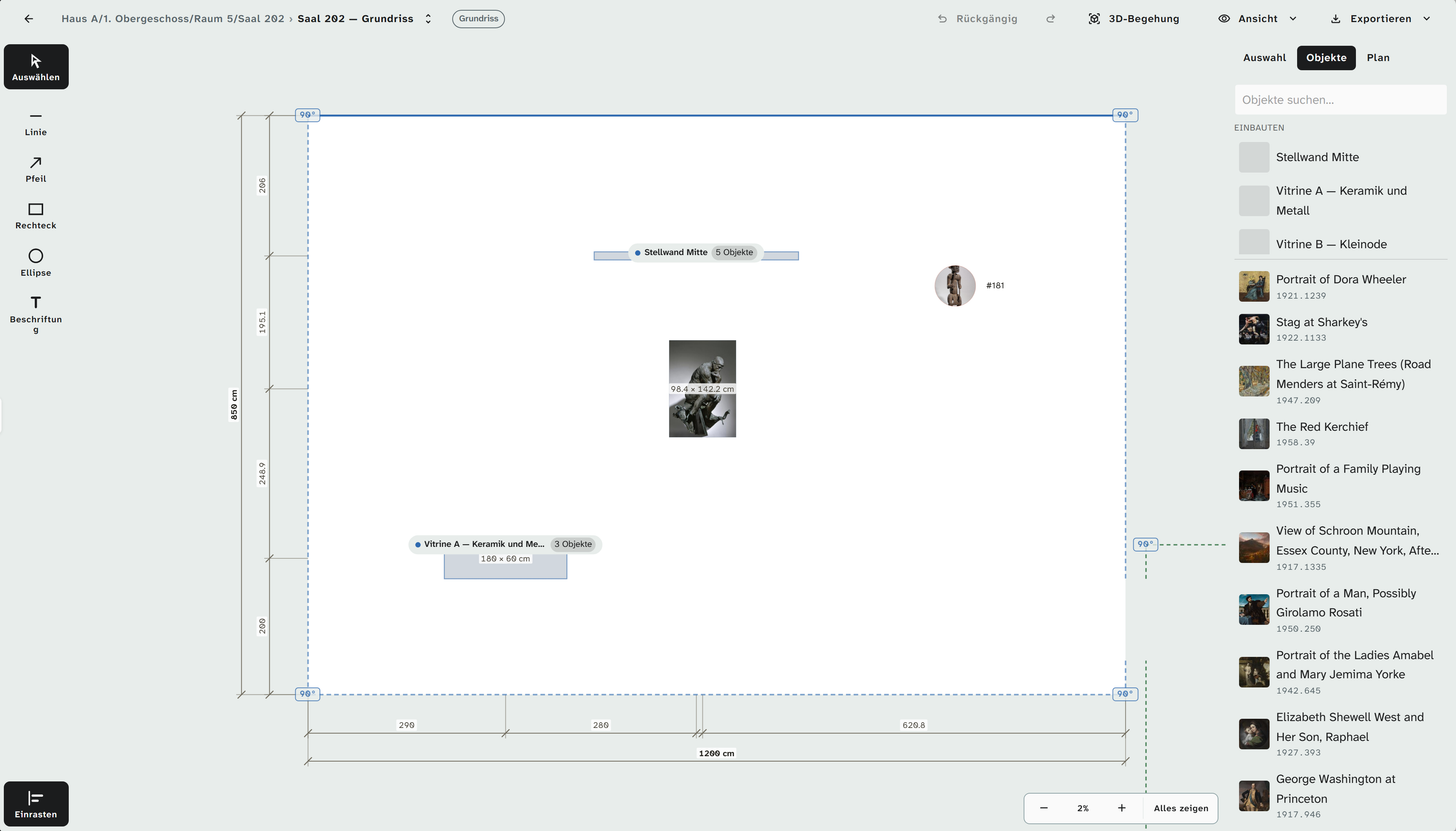
Creating and measuring a floor plan
An architect’s plan has a scale, but as an image Moliri knows nothing about it. Measuring tells Moliri.
-
In the plan library, click New plan, set Type to Floor plan and choose the Room. Upload the plan under Background and click Create. The floor plan opens in the editor.
-
On the right, on the Plan tab, in the Size section, choose Measure…. Measuring opens on the stage; a line above it tells you what to do next.
-
In Free mode, click two points of a known distance, such as the scale bar or a dimensioned wall, then enter the Real length. Moliri shows “Plan equals … × …“.
-
Apply. The Size section now carries measured. If you made a mistake, take it back with Undo.
If you know the dimensions of the room, you can also enter them directly as Width and Height.
By a wall mode measures by one of the room’s walls: choose the Reference wall, then click its start and its end on the floor plan. This also fixes how the floor plan lies on the floor in the 3D walkthrough.
Anchoring walls on the floor plan
So that the floor plan, the walls and the minimap fit together:
-
Open the floor plan in the editor and choose the Anchor tool on the left.
-
Choose the wall, then click its starting point on the plan (the left end, seen from inside the room) and a second point in the direction of the wall.
-
Save. Chained walls follow the anchored one.
Crop limits the floor plan to the room: click the outline or use From walls, then Finish.
Placing display cases and partition walls
Display cases and partition walls are plans of their own in the library (type Display case or Partition wall, with width, height and depth). On the floor plan they appear as a silhouette.
-
Open the floor plan in the project.
-
On the right, on the Objects tab, in the Fixtures section, click the display case. It appears with its footprint.
-
Drag it into position and, if needed, use Rotate left or Rotate right.
You can place the same display case more than once. A display case can also stand against a wall; there it shows its Front or Side, and Distance says how far it stands from the wall.
Free-standing objects
Objects from the Objects list land on the floor plan with their width and depth. If an object has no depth, it stands in the room as a circle with its width as the diameter; without a width, as a point.
In the 3D walkthrough a free-standing object appears as its 3D model if it has one and 3D is switched on. Otherwise its image stands upright at its position, as wide and as high as the object; the footprint stays marked on the floor. A point also stands upright in the same way if the object has a width and height.
Putting objects into a display case
-
Click the display case on the floor plan and choose Open vitrine.
-
The display case’s plan shows all sides on one sheet: front, right side, back, left side and the top view. Place objects as you would on a wall: on a side, or on the top view if they lie inside the display case.
-
For shelves, choose the Shelf tool and click the height on the side strip.
On the floor plan, the Selection tab shows how many objects a display case holds; clicking the count lists them.
Passages
On a wall, the Passage tool creates an opening and, where possible, its counterpart on the neighbouring wall at the same time. On the Selection tab, Leads to names the wall on the other side; Open “Name” switches to it. Passages connect rooms in the 3D walkthrough.
Further reading
- Walk through the room
- Wall planner : kinds of plan, measuring, toolbar