
Wall planner
Set up the wall planner in a project
The wall planner shows an object at the size recorded in its measurement fields. Which fields those are is set once per project.
Requirement
The project has a field of the field type plan. Without one, the project does not offer the wall planner
view. Creating a field is part of setting up Moliri, see Create a field .
Mapping the fields
-
In the project, open the View settings (the gear icon in the menu bar).
-
In the Wall planner section, under Width and Height, choose the number fields that hold the objects’ measurements. For floor plans and display cases, also choose Depth.
-
Next to each chosen field is Unit. If it shows auto, Moliri has recognised the unit from the field configuration. If it says Unit?, choose the unit in which the values are stored.
-
If there are 3D models: under 3D model, choose the file field that holds them.
-
If the project has several plan fields, choose the field you plan into under Plan.
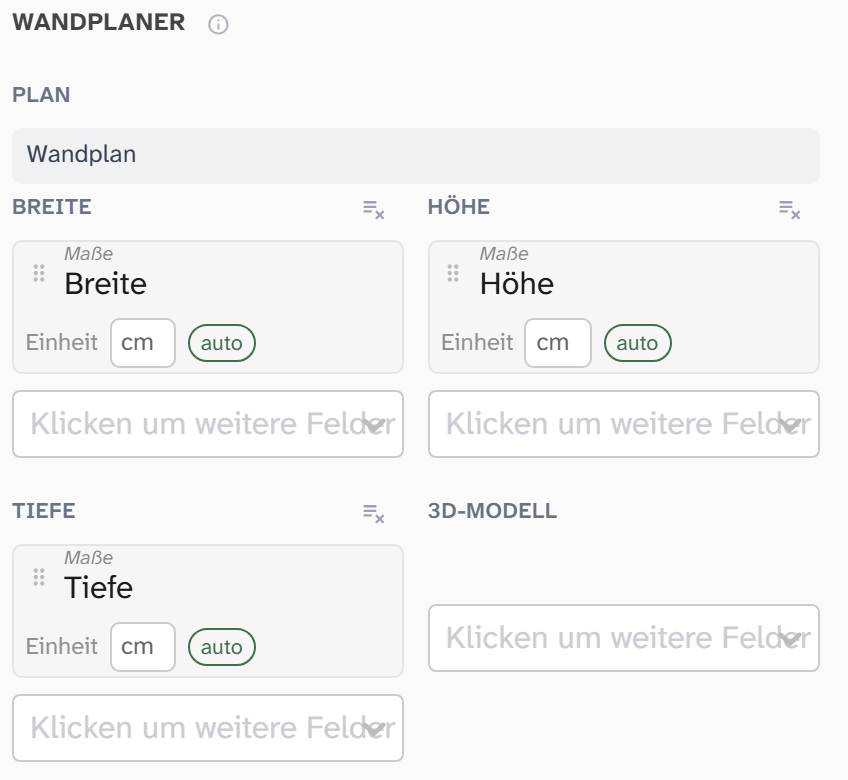
The image on the plan comes from the first file field chosen in the view settings.
If measurements are kept in different fields, such as “dimensions with frame” and “dimensions without frame”, you can choose more than one. The first one that has a value for the object is used. A framed sheet then hangs at its frame size and an unframed one at its sheet size.
Defaults for all projects
The same Wall planner section is under Settings › View › Field selections. What you choose there applies to projects that have no settings of their own.
Checking
Open a plan in the Wall planner view. On the right, on the Objects tab, objects with measurements are listed at the top. An object with the no size marker lacks measurements and would be placed as a point. If nearly all objects carry this marker, a measurement field is usually mapped wrongly or the unit is missing.
Further reading
- Create a plan
- Wall planner : which fields count as measurements
- View settings