
Data model
Layouts
A layout (input form) is a free arrangement of tiles on a grid. It stores no values; it determines what you see together while cataloguing. In the object view each layout appears as a tab.
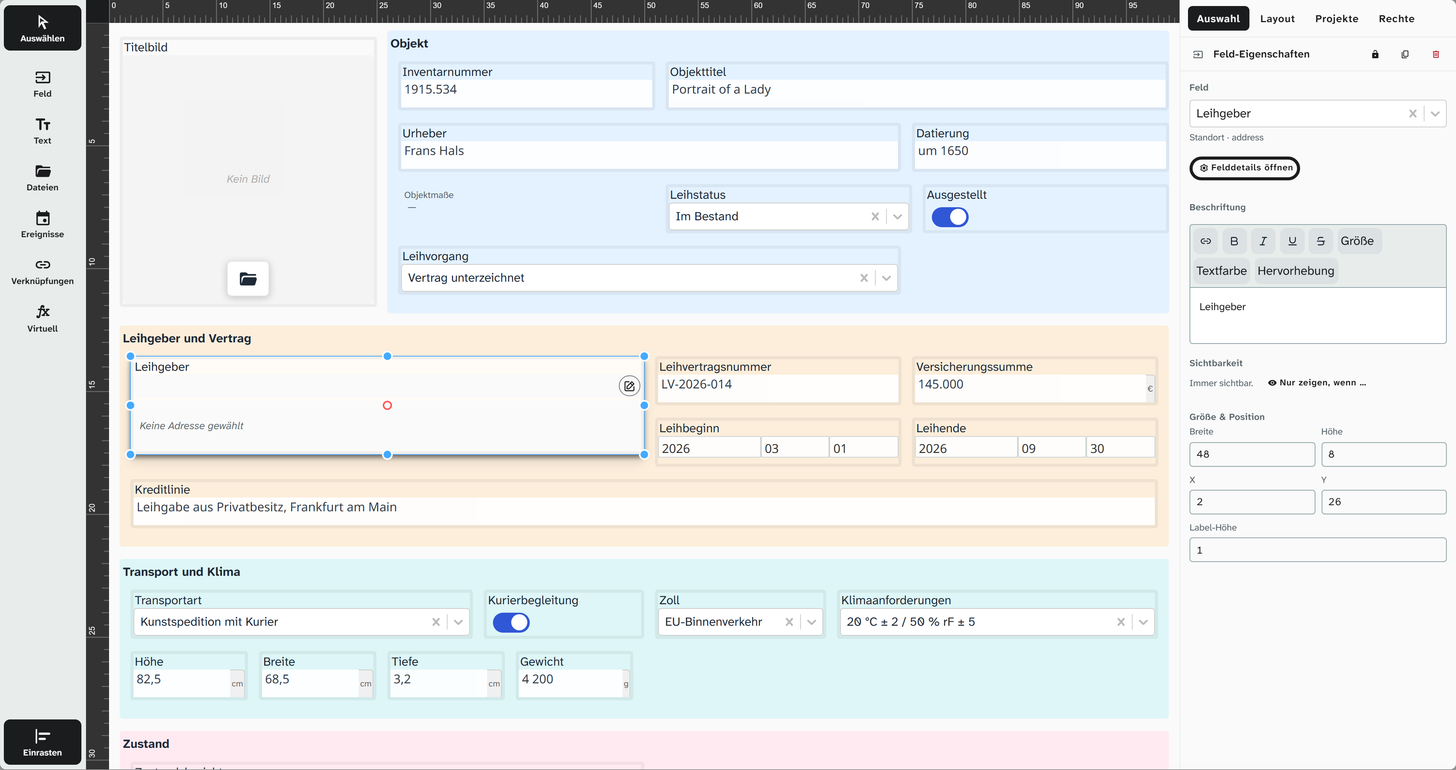
You manage layouts under Data model › Layouts (status 9). The layouts appear there as tabs along the top. The editor below has three parts: on the left the toolbar with one tool per kind of tile, in the middle the grid with rulers, on the right the properties in four tabs:
| Tab | Content |
|---|---|
| Selection | The properties of the selected tile; with several tiles, lock, copy and delete |
| Layout | Name, Default for new projects, delete |
| Projects | The projects in which the layout is switched on |
| Rights | The permission for Everyone and for each group |
To change the order of the layouts, drag their tabs at the top to a new place (Alt+arrow key moves the selected tab by one place). The object view shows them in this order too, unless a project sets its own.
Clicking a tile switches to the Selection tab. Every change is saved right away; the bottom of the toolbar shows whether saving is running, succeeded or failed.
Properties of a layout
| Property | Meaning |
|---|---|
| Name | The name of the tab in the object view |
| Order | Position among the tabs, changed by dragging the tabs |
| Rights | The permission for Everyone and for each group |
| Projects | The projects in which the layout is switched on |
| Default for new projects | If switched on, the layout is automatically switched on in every project created from then on |
The kinds of tile
| Kind | Contents | Particularity |
|---|---|---|
| Field | A field from the data model | The standard tile |
| Virtual field | A computed field | Display only, see Virtual fields |
| Label | Free text | For headings and structure, not a field |
| File area | The object’s files that match a filter | Set on the layout, not on the field |
| Event area | The object’s events, filtered by type | See Events |
| Link area | The object’s links to a library, filtered by type | See below |
Tile properties
| Property | Meaning |
|---|---|
| Size and position | Location on the grid |
| Label | The text above the tile on this layout. May differ from the field name and may be formatted (bold, italic, underline, strikethrough, link; for text tiles also text style, size, alignment, text colour and highlight) |
| Label height | How much space the label takes above the content. 0 means no label |
| Background color | Colour of a text or file tile: one of the colour swatches or a free colour through the colourful swatch at the end |
| Lock | Protects the tile from being moved by accident in the editor. A locked tile shows a padlock and cannot be selected; clicking the padlock unlocks it |
The label is the place for abbreviations, translations and explanations. It does not change the field name, which remains the identifier. See Fields .
A label tile can contain placeholders, such as the object ID, project ID, project name or the
value of a field. Insert them with the curly braces in the bar above the text, or type {{.
File area
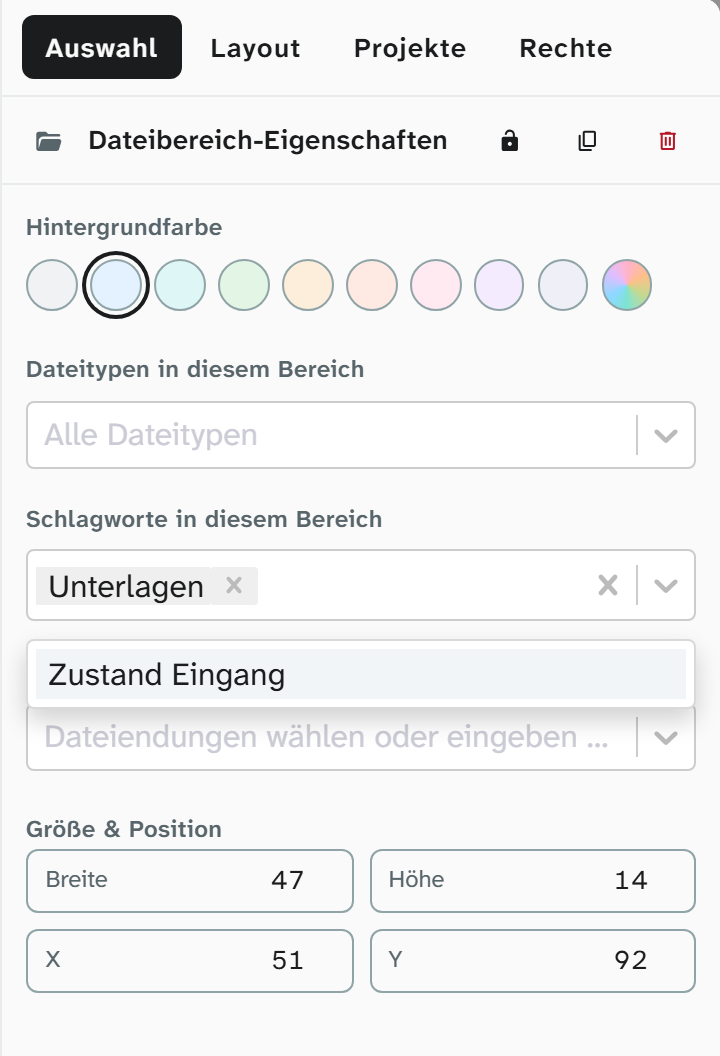
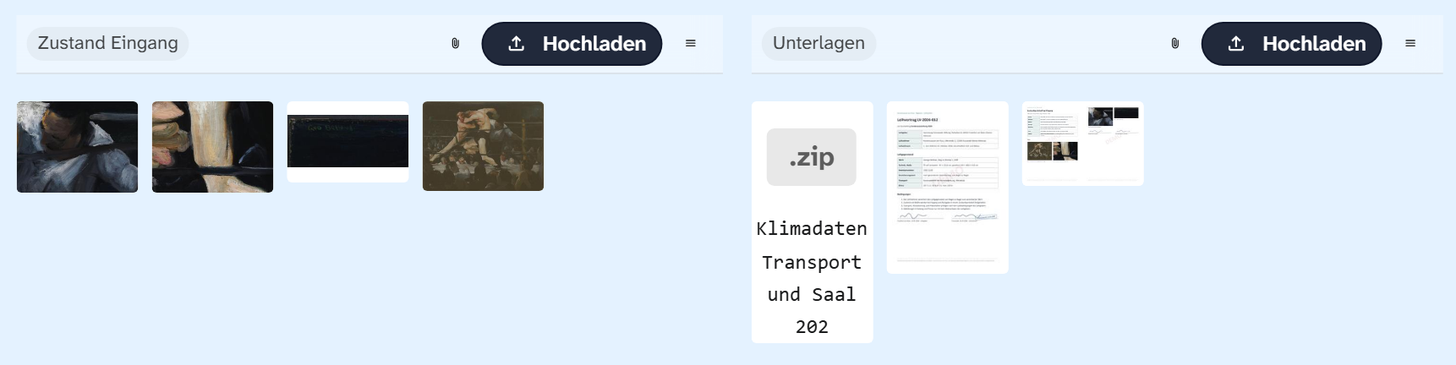
A file area shows the object’s files according to a filter. You set it up on the right in the Selection tab once the tile is selected. There are three lists, combined with AND:
| Filter | Example | Within the list |
|---|---|---|
| File types in this region | Image, Image (raw), Vector graphic, PDF document, Audio, Video, 3D model, Other file | OR |
| Keywords in this region | Zustand Eingang, Rechnung | AND: the file carries all of them |
| File extensions in this region | pdf, docx, zip | OR |
An area with type PDF document and keyword Rechnung shows all invoices as PDF. Empty lists do not
restrict anything.
Keywords in this region suggests the file roles from the administration (Data model ›
Link types, library Files), such as Main image or Catalogue image, in the language of the
interface. You can also type any other keyword. If the area still holds the key of a role, such as main_image, the list shows its label. What file roles are is explained under File roles .
A file that is uploaded into an area or attached from the library receives that area’s keywords; the key of a role becomes its label in the process. Word templates reach all files of the object, whichever area they are in.
Event area
Shows the object’s events , optionally limited to certain Event kinds. Empty means all readable kinds.
This lets you build forms for a specific task: a conservation form showing only conservation treatments, a loans form only loans.
Link area
Shows the object’s links to a library. Clicking the area shows the Link area properties on the right in the Selection tab:
| Property | Meaning |
|---|---|
| Library | Authority data, Addresses or Objects, the libraries that offer a selection for linking. An area that already shows another library, such as files, keeps it. Switching the library clears the types |
| Backlinks | Only with Objects: instead of the object’s own links, the objects that link to this object, read-only |
| Label | The title above the area. If empty: the name of the type if the area shows exactly one, otherwise the name of the library |
| Link types | The types the area shows and offers for linking, with their names. Empty means all readable types |
On the grid the area shows its label or the library, with the chosen types and their names below. A key for which no type exists any more is shown as the key.
If an area shows exactly one type with a maximum of 1, it appears like a field during data entry, with Replace instead of linking. Below an area of the library Objects, the hierarchy appears if one of its types forms a tree. The types themselves are described under Link types .
Dynamic layout
Besides the layouts you build, every object view has the Dynamic tab. It arranges the image and text fields chosen in the view settings automatically on a grid. It needs no assignment. What it shows is limited by project permission and field permissions.
Below the tiles is the section Links, with one area for each library that occurs as a link area in one of the project’s layouts, including an area with backlinks. It shows all readable types of the library, without hierarchy.
Assignment and permission
A layout only appears in a project if both of the following are true:
- It is switched on in the project (in the project details, Layouts tab, or in the layout editor in the Projects tab).
- The account has a permission for it, for everyone or through a group. Status 6 and 9 always have it.
If either is missing, the tab is missing. This is the most common cause of “the form has disappeared”.
The layout permission is capped by the project permission, and in turn it caps the fields: on a layout that someone may only read, they cannot edit any field. See Permission model .
Default for new projects only takes effect when new projects are created. Existing projects do not get the layout afterwards.
Practical rules
| Rule | Why |
|---|---|
| One form per activity, not per department | Someone who does both does not need two tabs |
| Fewer fields, larger tiles | A form with 80 fields does not get used; three with 25 do |
| Labels for structure | They cost nothing and replace any explanation |
| Maintain sample content | The editor shows it instead of real values; without it you build blind |
Further reading
- Building an input form : the procedure
- Object view : what a layout looks like while cataloguing
- Permission model : assignment and permission